I really enjoyed making the scene within Maya. This was fun and gave me a better knowledge towards the program. I had issues along the way, such as the fog and importing zbrush files into Maya.
I am glad I used zbrush although it limited my time, as it was VERY difficult to learn. Even teaching myself the user interface was....a nightmare. But Im happy to say I got pass that bump where you want to give up on a program and pushed through to where I want to learn more about it.
I kept things a little more simple than some of my other projects as I wanted to study Maya a bit more. In my previous projects I aimed real high and I never had that time to actually get to learn the software.
I am happy with the result of my scene, but truthfully sick of looking at it. I think I could have done better in my sculpture from zbrush, but again, not knowing the program, proved to be a huge factor in getting things completed and done to a high standard.
Tuesday, 18 November 2014
In Maya
I finally had my zbrush sculpt within Maya. I did have issues. Earlier I exported my UVs and Polypaint textures from zbrush into Maya for a test. This was fine. I then continued painting on my sculpt in zbrush expecting my texture to update automatically. I then finished painting and went to export my Uv and texture only to realise they didn't exist anymore. This I couldn't understand. To counter this issue I had to create a new Uv for my sculpt and then copy my new polypaint from my non clone sculpt and paste it to my new uv'd sculpt.
Here are some images of my sculpt once brought into Maya and placed within my scene.


Here are some images of my sculpt once brought into Maya and placed within my scene.
Here are a few rendered shots.
Displacement Map
I now had the issue of being able to import my sculpt to Maya but only in its lowest form of subdivisions. Therefore I need to also create a displacement map. Again, to do this I needed to find a tutorial online to see exactly what I was doing.
This is the tutorial I followed:
This was a great tutorial and helped with bringing in my displacement map to my sculpt.
This is the tutorial I followed:
This was a great tutorial and helped with bringing in my displacement map to my sculpt.
Tuesday, 11 November 2014


Thursday, 6 November 2014
Importing, Exporting
As I sculpted in Zbrush, I begun having fears of how my sculpt would be imported to Maya, as I had never exported anything out from Zbrush before.
To do this I needed to create a UV for my sculpt, this also included the polypaint. As I am new to Zbrush I had to find a tutorial with step by step insturctions to create UV's.
Zbrush has a great plugin called UV Master that basically allows the user to flatten their scult into UV's. There is little work needed and all I had to do was to paint the face of my scuplt to get it from being destroyed by the cutting of the UV. After the UV's are created I am easily able to export my file out of Zbrush and import it to Maya.
Here is the Youtube tutorial I followed.
https://www.youtube.com/watch?v=2Jl004CjUXk
To do this I needed to create a UV for my sculpt, this also included the polypaint. As I am new to Zbrush I had to find a tutorial with step by step insturctions to create UV's.
Zbrush has a great plugin called UV Master that basically allows the user to flatten their scult into UV's. There is little work needed and all I had to do was to paint the face of my scuplt to get it from being destroyed by the cutting of the UV. After the UV's are created I am easily able to export my file out of Zbrush and import it to Maya.
Here is the Youtube tutorial I followed.
Sunday, 26 October 2014
Frankenstein Monster
I first planned to create a mad scientists, but realized as I was doing this, Frankenstein's monster would have been more suitable to my scene. The main feature in my scene is the operating table so what more fitting than Frankenstein s monster on that table. Here are some shots of my preliminary 3D sculpt.


Monday, 20 October 2014
Next step
I want to create a 3D sculpt of a mad scientist to take my scene up a notch. I have recently acquired Zbrush which is another 3D sculpting software. This is what I will be using. Im not sure on how I will sculpt the scientist, my next step is to reference some images.
Rendered Shots
Some rendered shot of my scene.


Im very happy with the outcome, unfortunately you cant see the lightning as it is rendered with a different rendering engine.
Im very happy with the outcome, unfortunately you cant see the lightning as it is rendered with a different rendering engine.
Animated Lightning
My original scene has a large tesla coil within it pointing down to the main feature 'The operating table'. I wanted the tesla coil to have lightning coming out of it but I also wanted it animated too. To do this I used the lightning paint effect. I created a single lightning strike then then duplicated this single strike into many. I then had to transform the paint effect into a mesh, so I could then manipulate the object. Once this was done I grouped the lightning together and key framed the 'Seed' of the group. Doing this allows that single lightning strike to change form in each frame, giving the illusion of animated lightning.
This is a shot of the lightning.
This is a shot of the lightning.
Saturday, 6 September 2014


Wednesday, 3 September 2014
Short video on textures
Found a great short clip about assigning a lambert and a texture to an object. Also a mention about bump maps that is shown near the end of the video.
https://m.youtube.com/watch?v=T-fFpmBYP_Q
https://m.youtube.com/watch?v=T-fFpmBYP_Q
Saturday, 30 August 2014
Camera, detailing
This week I worked towards getting a camera set up showing a part of my scene. This is a short clip and will only show a section of my scene. Now that I have the camera set up, and know exactly where the focus points are going to be, I can now place more detail within that area.
I will also place shaders within my scene once detailing has been completed.
I will also place shaders within my scene once detailing has been completed.
Monday, 25 August 2014


Saturday, 23 August 2014
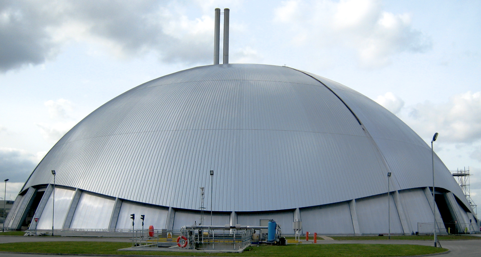
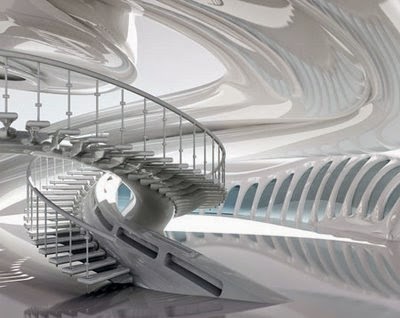
More
More images- these are futuristic building, along the the line of what i want my scene to look like.


Friday, 22 August 2014
Cables
I have been thinking about placing cables within my scene. To start with I actually wanted the scene to be covered in cables, I am still considering this, but acknowledge that it takes a while to create each cable, especially if you have to draw the curves then manipulate each point of that line to get the curves you are after. Below is a link that shows a way to create cables, this person also adds in extra dimensions by creating four cables and twisting them together to create a rope.


Subscribe to:
Comments (Atom)